|
|
|
|||||
Has this ever happened to you? You finally have a free weekend and you make a plan to head out and photograph some glorious landscapes, only to have Mother Nature rain out your plans? What to do now? Well, I'd like to make a suggestion. How about macro photography?
You've seen the photos. The gorgeous detail in a flower petal, or the fine texture in an insect's body, all brought to life in a vibrant image. That's the beauty of macro photography. It can be technically challenging, but creatively flexible. You don't need much to get started, and you can do it almost anywhere. Really! It's true!
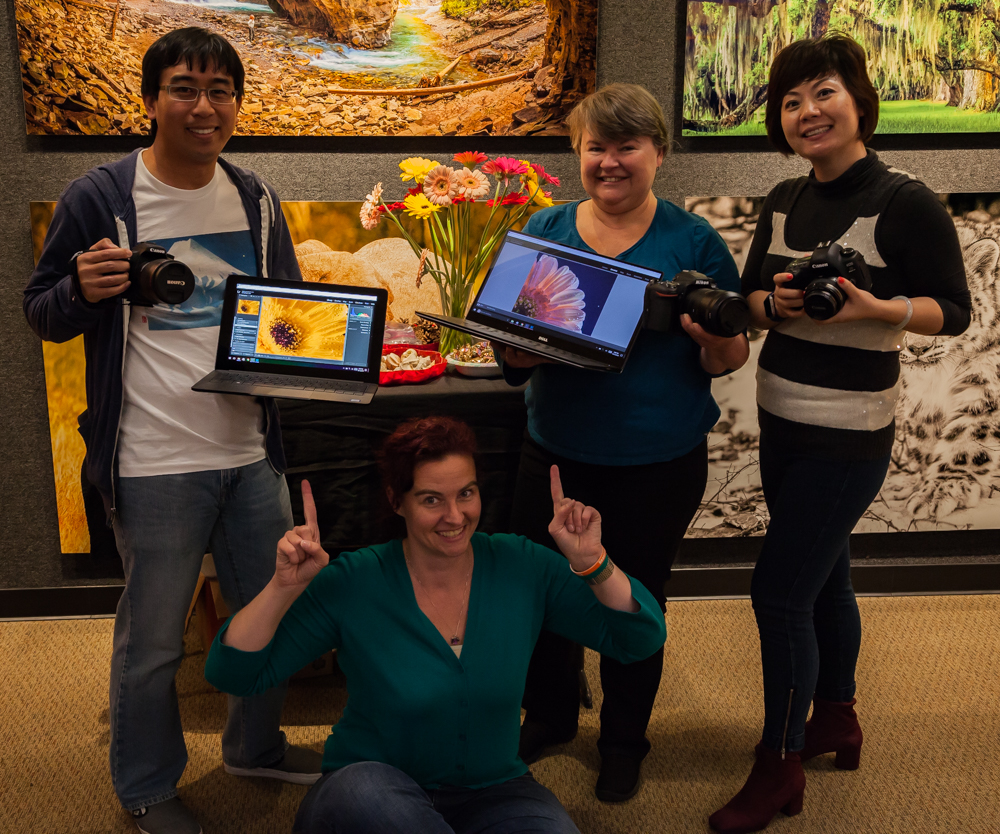
That's exactly what I set out to prove on a recent Saturday morning, when I met with three curious photographers at our Aperture Academy studio in San Jose, CA. Everyone arrived on time and excited to learn about this wonderfully creative genre of photography. With a small class, I knew I would be able to spend lots of quality time with each of my students.
Our day began with a quick introductions so I could get to know a little about my students, tell them what to expect from the day, and they could get to know a little bit about me.
After the introductions were complete, it was time for a brief presentation introducing macro photography. I defined macro photography vs. "close-up" photography, introduced some of the types of equipment that is available, and what characteristics make a macro lens unique.
Next, I moved on to the more technical aspects of macro photography involving the exposure triangle: aperture, ISO, and shutter speed. I spent a significant portion of time reviewing how depth of field impacts macro photography, which is important to understand because minor adjustments can make a big impact on the finished image.
Finally, I reviewed some of the creative aspects of composition, reminding students that the use of leading lines, and rule of thirds principles, are just as important in macro photography as in any other genre. I also showed some examples of macro photography from my own portfolio so the students could get an idea of the endless possibilities.
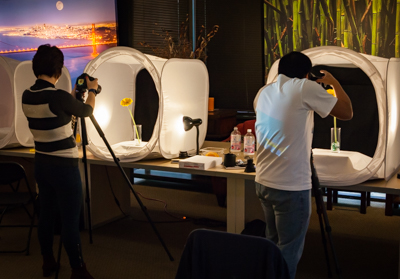
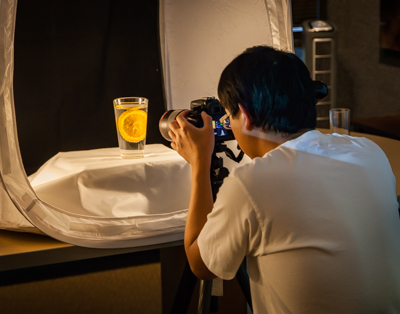
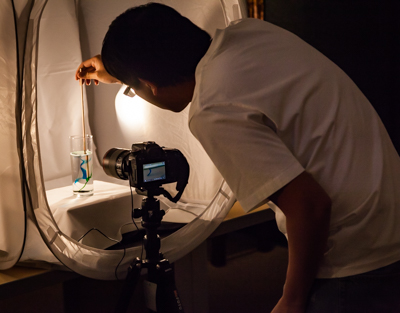
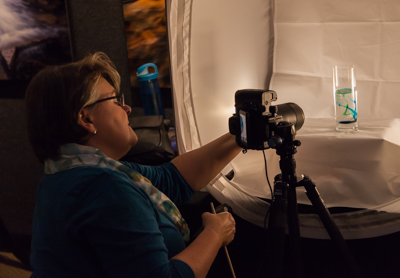
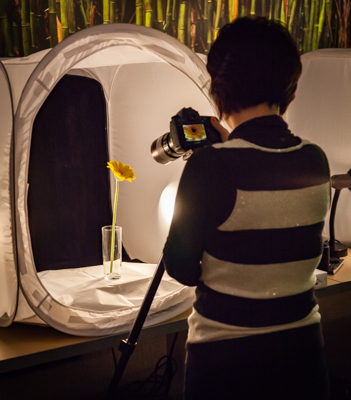
Once we had the basics covered, it was time to get hands-on and start shooting. Each student set up their tripods and cameras at their own individual light stations. I took a moment to describe the three main subjects we would be working with and what the specific challenges were for each. Then I helped everyone get set up for the first round, and the fun began!
 Over the next two hours, my students were challenged to "see" each subject in a different way. I wanted them to see how the character of a subject changes depending on where the light source is, what angle you are shooting from, etc. Changing the direction of the light source can highlight details that didn't show up before. Changing the angle from which you shoot can showcase character details that would be otherwise unseen. But more than anything, I wanted my students to just have fun discovering what worked for them.
This is one of the best aspects of the workshop environment. Students can try all kinds of different settings and adjustments and get immediate feedback and critique, which can really help solidify the new principles and techniques.
A very useful technique for macro photographers to learn is that of focus-stacking. We often find ourselves in situations that require us to shoot in shallow depths of field, either due to lack of light, or because we want a certain softness or tone to our images. Under those conditions, it can be difficult to get an image that is crisp and sharp all the way through and we end up with images that are sharp in some areas but not others. This challenge can be overcome by focus-stacking images.
This technique involves taking a series of several images, each one with a different plane of the image in focus, so that when "stacked" in Photoshop, you get one image that is sharp all the way through. I took a bit of time and worked with each student to get their series of images that we could "stack" later during processing.
After I had gone through each of the pre-set subjects, we still had a little time before lunch break. With no further planned subjects to shoot, I told everyone it was time for "recess" and that they could pick their own subject and let their creativity loose!
This is the part of the class that I most enjoy. I can never predict what subjects the students will choose, and it is always fun to see what everyone picked and connected to. It is challenging to me as well, as I try to help each student bring their vision to life.
 I was delighted to see that my students' creativity had been unlocked and they were adventurously trying all kinds of combinations of subject matter. I continued to work with everyone to help them capture their vision and it was clear that the concepts were becoming more familiar.
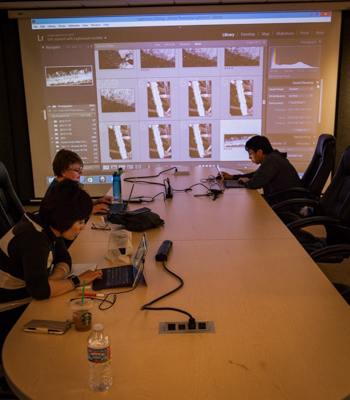
Soon it was time to break for lunch, and while my students went off in search of something yummy to eat, I transformed the studio into the processing lab. After lunch, everyone settled around the table and quickly got to importing their images into Lightroom so that we could see what our creative minds had come up with.
The processing portion of our workshop starts with how to import, review and select favorite images in the Lightroom Library module. Then, we moved to the Develop Module, where I covered how to crop an image, adjust exposure, contrast and white balance.
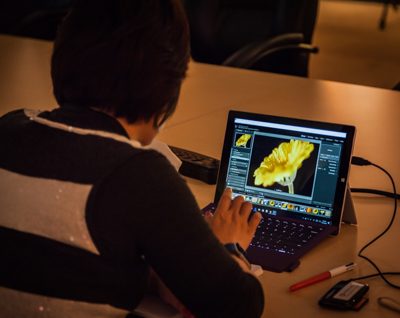
Next, I showed my students how to sharpen an image and minimize noise. The final touch was to add some slight vignetting, just to emphasize the focal point of an image. At that point the processing was done, so I covered how to export their finished images, highlighting the settings designed for either web posting or printing. Whew!! That was a lot of information!
But we still had one more thing to cover.... Remember that series of images we captured? We still needed to process them with the focus-stacking technique. I showed my students how to select those images in the Lightroom catalog and open them in Photoshop layers to align and blend for a final image that is sharp and crisp edge to edge.
The final results were really wonderful to see! This is a technique that takes some practice, but now my students had one more tool in their photographic tool bag.
We were very quickly approaching the end of our time together, and I spent a bit more time addressing specific questions, and making some equipment and further workshop recommendations. But soon, with a final thank you, I sent my students on their way to enjoy the rest of their day, ready to practice their new macro photography skills.
Until next time,
DeAnna, and the rest of the Aperture Academy team!
P.S. If you'd like to join us at one of our workshops, you can find the schedule/sign up here.
 |
 |
 |
 |
 |
 |
 |
 |
 |
 |
 |
 |
|
 |
Other Cool Stuff→ Past Workshop Photos → 72dpi.com → How-To Articles → Photographer of the Month |
|
Contact Us→ Contact Us → About Us → Site Map |
© 2009-2024 Aperture Academy, Inc.