|
|
|
|||||

Let me ask you if any of the following sound appealing to you as a photographer: Accessible locations? Minimal Planning? No Strenuous Activity? Photography during mid-day?
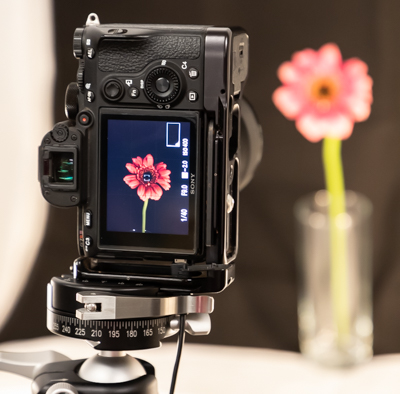
If any of those sound good to you, then Macro photography might just be your game. No, really. It’s true. Let me explain. Unlike many genres of photography, Macro photography subjects can be found within minutes of your home. Flowers, trees, insects, even household items are ideal subjects for Macro photography. All very accessible. Not only that, but these are subjects that also do not require a lot of set up and planning. With Macro photography, it can really be just about getting out and shooting.
Other forms of photography can require strenuous activity, hiking trails to the perfect view, crouched down in an uncomfortable position waiting for a bird to land in the right light. Not so much with Macro photography. Once you select your subject, you can explore multiple angles from various points of view. And you can do this at practically any time of the day. You don’t have to wait for “golden hour”, and you can be out in various light conditions; sunny, cloudy, rainy, etc.
See, it’s true. So if that sounds like it might be interesting to you, I think you should give macro photography a try.
 That’s exactly what happened on a recent Saturday morning when I met 5 students at our Aperture Academy studio in San Jose, CA. They were ready to challenge themselves and add another page to their photography skills catalog, and I had some wonderful activities in store for them.
After everyone arrived and got settled, I started the day with some brief introductions to find out a little more about everyone. We had various levels of experience, which keeps it fun for me as an instructor. When introductions were complete, I gave a brief presentation regarding the technical and creative aspects of Macro photography and covered some of the concepts that my students would be discovering today.
We talked about the technical side of photography introducing the concept of the Exposure Triangle which is made up of Aperture (depth of Field), Shutter Speed (Motion Blur), and ISO (noise), and how these aspects work together to create your image. Changing one of these aspects affects how the others work, so it is important to understand the dependencies.
 Next, we covered some of the more creative challenges in photography and how those can be applied to Macro Photography. Using techniques such as leading lines and the rule of thirds, can help your viewer understand the “story” in your image. Also, it is important to be mindful of the overall composition of your image taking notice of any potential distractions in the background or foreground that might take the focus from the photo’s subject. After the presentation, and some final questions, we were ready to get shooting! And honestly, that's the real reason we were all there that day.
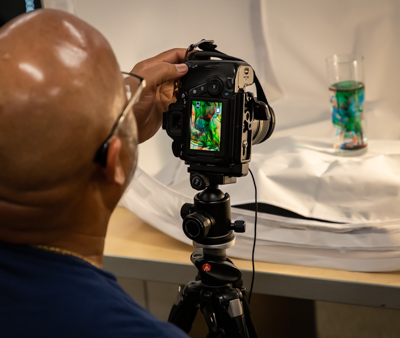
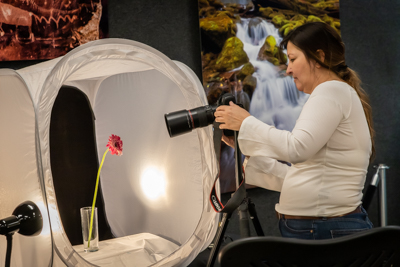
One of the reasons I like this workshop so much is because every student gets their own station to work at. We can control a lot of variables that, in nature, might be a real challenge. As everyone gets set up at their stations, I tell them the plan for the rest of the morning. I have chosen specific subjects for them to photograph, each one having a particular purpose or challenge to address. After we have worked with the chosen subject matter, I will let them have some free time to put everything together and photograph what they want, making available to them a variety of objects and subject matter to choose from.
We are well underway and I introduce another technique that can be very useful to Macro Photographers, that of Focus stacking. Because Macro photographers tend to work with shallow Depths of Field, we can struggle with getting a subject sharp all the way through an image. Focus-Stacking can help overcome that. By taking a series of images with different parts in focus, we can “stack” them together in Photoshop for a final image that shows the sharpest parts of each of the individual images. It’s a great technique to know, but definitely requires a little practice.
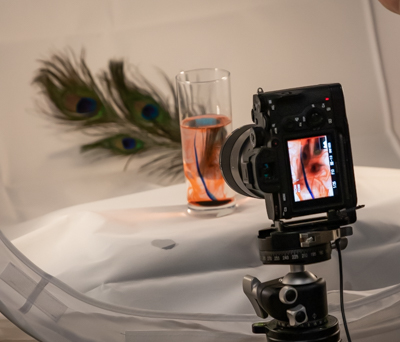 We continue with our shooting time and I work with each student to help capture the images they are looking for and to re-inforce the techniques and concepts we covered earlier. I challenge them to step outside conventional and look for the interesting characteristics in their subjects. That sometimes means shooting from a different angle or changing the source of the light to pick up small details, or abstract patterns. It is really rewarding to see students grasp the ideas and come up with amazing images all on their own, which everyone was doing!
Soon, it was time to break for lunch, which gives me time to set up for the afternoon’s processing session.
During processing, I show the students my method for image selection in Adobe LightRoom. Then we go through the Develop Module and I introduce them to my workflow for editing images. It may not be a comprehensive LightRoom lesson, but it definitely gives a nice foundation for the students to explore and create their own workflows. I review how to crop, make minor corrections, and then adjust for exposure, color corrections, and noise. Finally, I show them how to export their images for print or for web viewing.
But wait! We forgot something. What about those images we took for focus stacking? Well, we worked with those as well. I showed everyone how to open those images as layers in Photoshop and blend them into one master image capturing all the sharpest parts, that can then be brought back into LightRoom for further editing, if necessary.
Whew! That’s a lot of information to cover in one day, but we did it! After a few final questions and a pose for our group photo it was time to close the books on another successful Aperture Academy workshop.
Until next time,
DeAnna and the rest of the Aperture Academy team!
P.S. If you'd like to join us at one of our workshops, you can find the schedule/sign up here.
 |
 |
 |
 |
 |
 |
 | |
|
 |
Other Cool Stuff→ Past Workshop Photos → 72dpi.com → How-To Articles → Photographer of the Month |
|
Contact Us→ Contact Us → About Us → Site Map |
© 2009-2024 Aperture Academy, Inc.