|
|
|
|||||

With the increased performance from DSLR cameras, and the ability for photographers to get out and learn photography in the moment, there is no wonder that so many of them want to learn how to take wonderful night images of the stars.
The most difficult part of this equation, however, is Mother Nature. She often has plans of her own, and will ruin a potential night shoot with clouds and rain, as so many of the group of photographers that met me, Aron, and Mike, have found out in the past. This workshop was the third reschedule for some folks specifically due to un-cooperative weather. This night, however, looked to be awesome, and we were all excited to head out to Pinnacles National Park to do some night photography!
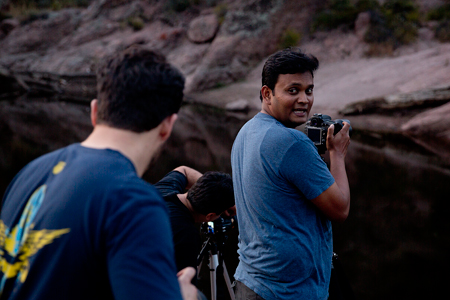
Aron, Mike, and I met the group at our San Jose gallery location for orientation and a brief slide show on what our class would entail. Everyone had the required gear, so the only thing left was to load up in the van and head out to the park!
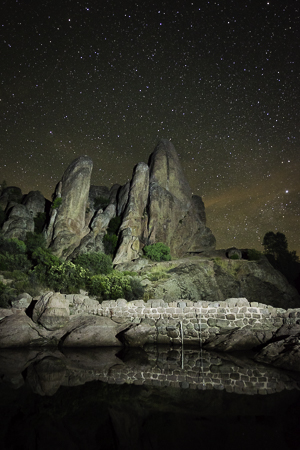
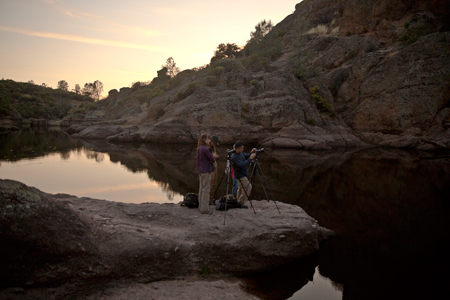
The trail to our shooting point winds along some of the oldest rock in the state. It's truly hard to believe that this wonderful area is only an hour from the hustle and bustle of the city. We wound our way up the hill, and through a cave before heading up a narrow staircase that led us to a wonderful reservoir. This would serve as a foreground for our images.
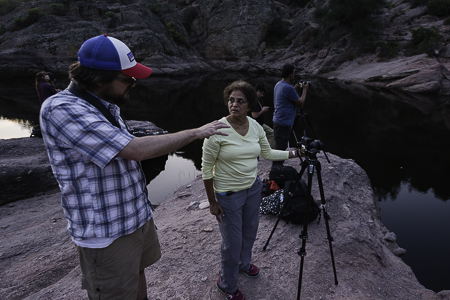
 We helped everyone get set up and began working with them to get their focus dialed in with test shots made at the apertures we would be shooting when it got dark. It's often difficult to get the best focus when the light has faded, so doing it in the light makes sense, especially for learning. We also encouraged the group to visually look where their focus was on the lens, so in case they should lose focus after dark, they could find it again with a small light and not have to refocus.
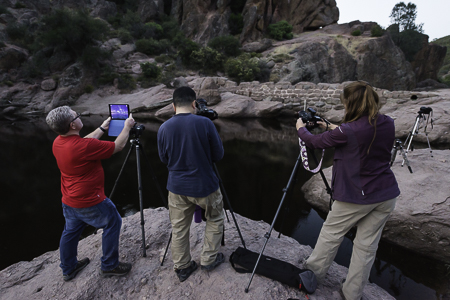
Intravolometers were set and tested, and everyone was ready. All we had to do was wait for the light to fade. Once that happened, we set the stage by going over the techniques for shooting pin-point stars with the class. This technique requires exposures of 20-25 seconds. With that time limit and high ISO, we're able to see the stars, as well as not have much movement...making the stars look like little pin points.
We'd also begun to work on perfecting our light painting of the rocky structure before us. Because it isn't a perfect science, it often takes a few attempts to get the right amount of light on the subject, and also find the right light! (Thanks Chris!) And we did.
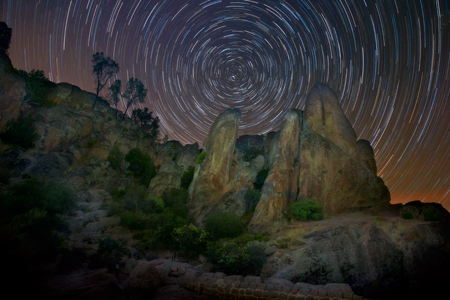
Once the pin points had been shot, we moved to star trails. We captured a group of (12) 5-minute exposures, that we combined later in Photoshop. We only light painted the first frame, and left the other 11 to expose naturally. With a little higher aperture and lower ISO, we can stretch exposure times to five minutes, which gives us some streaks in the stars as the earth spins.
 This process takes an hour, and everyone waited patiently for their exposures to finish. When we'd all collected a nice amount, it was back to a few more pinpoint stars. It was darker by then, so there were plenty more stars in the sky! Once we completed these, and got an interesting group shot, it was time to make the hike back out.
If you think the hike IN is an adventure, try hiking out in the dark! We stuck together as a group, and were able to make it down with us all in one piece. From there, all that was left were a few comedically timed alarm malfunctions near the campground, and a 75 mile drive, and we were back at the gallery. It was after 1:30 am, and we had an early morning the next day, to put all of our images together in the processing portion of the class. So our tired, but happy, group got some sleep.
For most folks, 9 am rolls in early... but everyone was as chipper as they could be. I tempered the early morning a little with coffee and doughnuts, while we set everyone up on a computer and got their images downloaded onto the machine. After a little fussing with some raw issues, everyone was ready to begin to assemble their images.
This next part was quite simple... we stacked the star trail images together, changed the blending mode to lighten (to allow only the lights pixels from each image to shine through) and bam! Star trails! Of course, we went over how to make them look like comets, how to process the colors of the image and make it look sharp...all of the necessary things to make the most of these great shots.
What I always enjoy the most in this class is how 12 different people can come away with 12 different compositions and 12 different aesthetically pleasing images. We were all really happy with the shots we saw on the student machines!
Star photography can be a little daunting at first, but it is not nearly as difficult as it might appear. Mother Nature threw us a clear sky, and we came back with the prizes we intended on capturing...it was a great night!
Until next time,
Brian, Aron, Mike, and the rest of the Aperture Academy team!
If you'd like to join us at one of our workshops, you can find the schedule/sign up here.
 |
 |
 |
 |
 |
 |
 |
 |
|
 |
Other Cool Stuff→ Past Workshop Photos → 72dpi.com → How-To Articles → Photographer of the Month |
|
Contact Us→ Contact Us → About Us → Site Map |
© 2009-2024 Aperture Academy, Inc.