|
|
|
|||||

Star photography is fast becoming one of the most popular realms of photography today. With the onset of more and more cameras that are capable of higher light absorption with much less noise, photographing at night has finally made its way to the masses. It’s pretty fun too! I think the allure of it is that you really don’t know what you're going to get until after you commit to taking the picture. It’s a risk-reward system at its core. There are also so many things that have to be right for you come away with a pleasurable experience and some great images. Rarely in California are we shut out of traditional photography because of the elements, that’s why we all live here right? For sunny skies and warm temperatures. But night photography, especially star photography can be a little harder. This month’s class was a makeup from a prior attempt, which was cancelled due to not having the correct weather, namely clear skies.
Like every Aperture Academy class we start with a round of introductions and a short primer on the events about to unfold. I met my group at our headquarters in North San Jose, we spent a little time introducing ourselves and I told them how the night would go and what to expect once we were on scene. Then we began the 2-hour drive south into the central valley. To aid in getting some really cool shots of stars at night, you really need to get away from city populations. The glow of city lights can be seen for tens of miles, and can ruin your shot. So we drive down to Pinnacles National Park, which is far enough away from the cities in the bay area, to have nearly black skies at night.

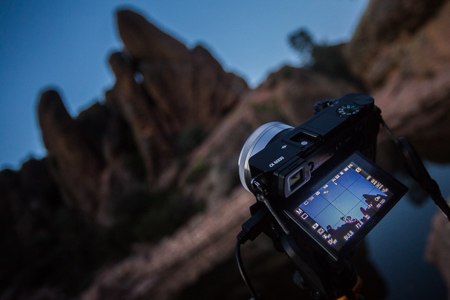
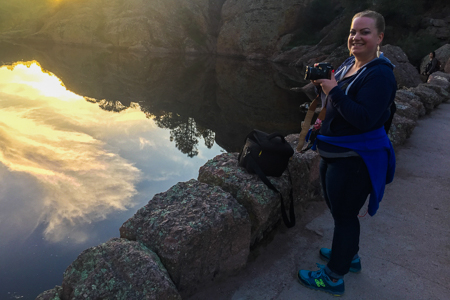
As we made our way up the trails in Pinnacles, we chatted about how we were going to achieve the shot of the night, how to compose, and basic settings, all while taking in the natural beauty of our newest National Park. Once at the reservoir, I encouraged my group to use the remaining daylight to find "their shot" by walking around, examining the scene, and taking some test shots. Once we setup, we can’t move, we're in it for the long haul. As it began to get darker, everyone settled in to a shot which they liked, with a nice beautiful sky overhead, using the rocks as a static foreground. Before long it was dark enough to start taking some serious photos. We programmed our intervalometers with some settings and then once we were satisfied that everything was 5 by 5, we started. The process of star trail photography is simple enough. Setup, begin shooting, wait, go home. I wanted us to have enough photos taken so the stars appear to move across the sky with nice big trails. If you want longer trails, you have just have to shoot longer. We aimed for 1 1/2 hours. That should be perfect to get some serious movement. Since we had the moonlight, we didn’t need to illuminate our foreground at all, we just waited for the moon to traverse the sky, and just when we were ready to pack up, we grabbed a couple extra shots of the Pinnacles with some more even lighting. After that, we hiked down the hill and made the long drive home.
The next day, we met at the Aperture Academy Studio to bring together all the shots we had taken and let Photoshop and Lightroom do some magic. Starting in Lightroom, we imported and organized our photos. Then we took our finest ones and the collection of photos we would be using for the star trails, and after some minor processing, we sent them to Photoshop for layering. Since we cannot simply take one shot and leave our shutters open for an hour and a half (digital noise would be too great), we have many shots each exposed at 2 minutes. So we have all these pieces of star trails that we need to combine in Photoshop. By using blending modes, we can take just the lighter pixels of every shot and combine all of them into a single frame, which spans over an hour. After this one simple step, we instantly have a fully compiled star-trail shot. But we weren’t done. Since we had the moon in the sky, the stars were a little faint, so we took the final image back to Lightroom and processed our sky to bring out the light trails. Then we moved back into Photoshop to stitch in a foreground shot, which was lit by the moon. After some masking, we hid the sky portion of the moonlit foreground, and viola! We magically had our finished image. We had some problems with condensation building up on our lenses, and the moonlight illuminated that condensation to the detriment of our image. But with some creative processing and cropping, we all had succeeded in creating an awesome star trail shot!
Thanks to our workshop participants for being patient and understanding with our fickle California weather! We did it!
Until next time,
Scott and the rest of the Aperture Academy Team!
If you'd like to join us at one of our workshops, you can find the schedule/sign up here.
 |
 |
 |
 |
 |
|
 |
Other Cool Stuff→ Past Workshop Photos → 72dpi.com → How-To Articles → Photographer of the Month |
|
Contact Us→ Contact Us → About Us → Site Map |
© 2009-2024 Aperture Academy, Inc.